
——You upgraded your camera—but your plant photos still feel flat. Here’s why.
By Lucas Bennett | Updated on April 16, 2026 | 🕓 9 min read
Key Highlights
- Why does increasing sharpness often make plant photos look worse instead of better?
- What role does lighting play in making a plant photo feel flat or dimensional?
- How does depth of field influence where the viewer’s attention goes?
- Why do highly detailed macro shots often fail to create emotional impact?
- How can you simplify a visually chaotic plant scene before pressing the shutter?
- What practical changes can improve your photos without buying new gear?
One of the most common problems in macro photography is that even when the image is technically sharp, it still looks flat.
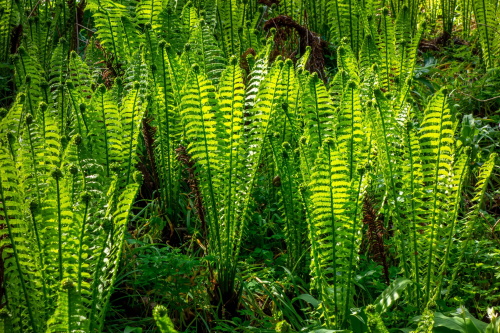
This is especially true in plant photography, where texture often replaces composition.
I’ve been through this stage myself. You save up, buy a sharper macro lens, upgrade to a higher-resolution body, maybe even go full-frame. You go out, find a beautiful leaf or a delicate flower, focus carefully… and the result still looks like a specimen pinned to a whiteboard.
Sharp? Yes. Alive? No.
Most photographers assume: more sharpness = more detail = better photo.
In plant photography, this equation quietly breaks. Worse still—expensive gear can make the problem harder to notice, because you keep blaming yourself: “Maybe I just need an even better lens?”
No. You need to change the way you see.
I. The Trap: Why We Obsess Over Sharpness
Cameras are sold through specifications. More megapixels. More detail. Higher MTF charts. The entire industry pushes one message: clarity equals quality.
But when you photograph plants—already full of complex textures, overlapping shapes, and natural visual chaos—maximum sharpness often works against you. It doesn’t organize the chaos; it simply makes the chaos more visible.
I’ve taken strong plant photos with a ten-year-old DSLR and a kit lens. I’ve also seen lifeless images shot with $5,000 setups. The difference was never resolution. It was how the photographer structured the scene.
So let’s break down four major misconceptions that keep plant photos boring—even with upgraded gear.
II. Misconception 1: Why Sharpness Cannot Fix Macro Composition
Sharpness increases information. But information is not meaning.
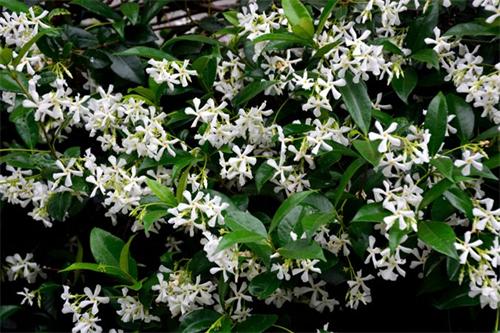
Imagine photographing a cluster of jasmine flowers tangled together. Your new lens captures every stamen, every vein, every hair on the stem. Sounds impressive—until you realize the viewer has no idea where to look. Everything is equally sharp. Everything competes for attention.
A “good” image needs three things:
l Layers (foreground, subject, background)
l Visual flow (where does the eye go?)
l Subject priority (what matters most?)
Sharpness provides none of these. It only magnifies whatever structure you already had.
Try this small test: slightly blur your sharpest plant photo. If it becomes completely unreadable, you never had strong composition—you just hid weak structure behind high resolution.
High sharpness ≠ strong visual structure. Often, it’s the opposite.
III. Misconception 2: Why Expensive Macro Lenses Don’t Fix Flat Plant Photos
Most boring macro photos are not lens problems. They are lighting problems.
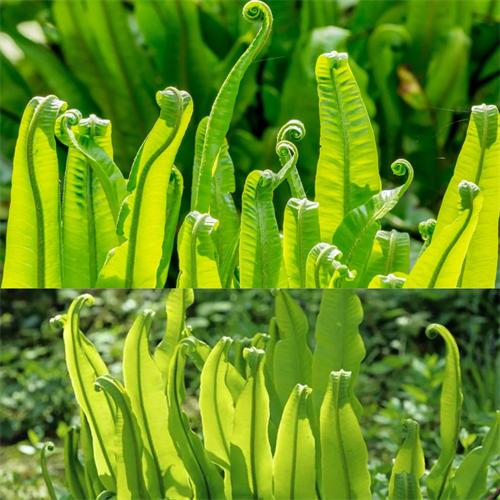
I once shot the same fern using the same professional macro lens in two lighting setups. One looked like a flat textbook scan. The other looked alive. Same lens. Same camera. Same aperture.
What changed? The way I shaped light.
Common mistakes:
l Direct hard light — flattens texture and creates harsh highlights
l No shadow structure — without shadows, there is no volume; plants look like cutouts
l Over-even exposure — the “scanner effect,” where everything is equally bright
Light is not illumination. Light is structure. It sculpts form, separates subject from background, and guides attention.
Even with top-tier macro lenses, using frontal flat light or overly even lighting will still produce flat results. Side light reveals texture. Backlight creates edges. Diffused window light or overcast conditions often produce more dimensionality than studio setups.
A lens records what light defines. Learn light first. Upgrade glass later.
IV. Misconception 3: Depth of Field Is Misunderstood — “Everything Sharp” Often Ruins the Image
Depth of field is not a technical setting. It is a storytelling tool.
Many photographers think: “I want the whole flower in focus.” So they use f/11, f/16, even f/22. The result? Everything is sharp—but nothing is emphasized.
At f/2.8, you may only get a tiny section of a stamen in focus. It feels fragile. At f/16, every petal, every background leaf, every distracting branch competes for attention. This is not photography—it’s information overload.
A better approach is to use depth of field to create a reading order.
l What should the viewer see first? Keep that plane sharp.
l What supports the subject? Let it be slightly softer but readable.
l What adds nothing? Blur it until it disappears.
A plant photo without a clear focal priority is like a sentence without emphasis. You can read it, but you don’t feel it.
So stop chasing “everything sharp.”
Start chasing meaningful sharpness.
V. Misconception 4: You’re Not Photographing Plants—You’re Photographing Surface Texture
This is the most subtle trap.
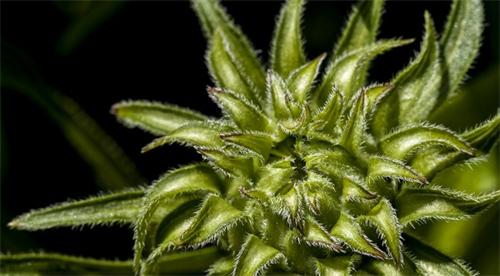
When you get very close with a macro lens, plants stop behaving like plants. They become:
l Petals → color gradients and abstract shapes
l Veins → graphic lines
l Dew drops → reflective points
l Pollen → textured dots
Individually, these can be interesting for a few seconds. But they rarely hold attention, because there is no emotional structure or relational context.
A memorable plant photograph does not only show texture. It shows:
l Relationship — the plant in relation to its environment (a leaf reaching from shadow into light)
l Mood — morning coolness, midday heat, evening softness
l Breathing space — negative space, blurred regions, areas for the eye to rest
Compare:
l Boring macro: a perfectly sharp, evenly lit rose petal filling the frame. You see every cell. You feel nothing.
l Powerful plant photo: the same rose, side-lit, with a soft background and only one stamen in sharp focus. You feel weight, presence, and life.
The first is a texture study. The second is photography.
VI. The Real Problem: You Lack “Visual Design Thinking”
Here’s a framework I use to diagnose my own failed images.
Photography has three layers:

Most photographers get stuck at the first level. They buy sharper gear hoping it will solve problems that exist in the second and third layers.
The uncomfortable truth is: expensive gear can make this worse, because it creates the illusion that the problem is technical. You shoot a boring, flat, lifeless image—but it’s razor-sharp and noise-free. So you think: “The gear is fine. Maybe the plant just isn’t interesting.”
No. You need to redesign how you see.
VII. How to Fix “Boring Plant Photos” (Without Spending a Dollar)
You don’t need new gear. You need new habits. These four shifts matter more than any lens upgrade.
A. Control the Visual Lead
Let only one thing “win” in the frame.
Before pressing the shutter, ask: “What is the single most important visual element here?”
If you can’t answer in three seconds, your composition is too chaotic. Choose one. Then use focus, light, and framing to ensure it is the first thing seen—and the place the eye returns to.
B. Use Light to Create Volume
l Side light — reveals texture and creates depth through shadows. Move your light (or the plant) until you see clear highlights and shadows.
l Backlight — turns leaves and petals into glowing shapes. Especially effective for semi-translucent plants.
l Avoid front flat light — unless you intentionally want a graphic, flat aesthetic (which is fine—but must be deliberate, not accidental).
Simple test: take three shots outdoors—front light, side light, and backlight. The difference will be immediate.
C. Use Depth of Field to Cut Space
Don’t aim for everything sharp. Aim for meaningful sharpness.
l Busy background → use wide aperture (f/2.8–f/4) to isolate the subject
l Clean background or structural relationships → f/8–f/11
l For living plants, rarely go beyond f/16 (full-frame) or f/11 (APS-C). Diffraction will soften everything equally and destroy visual hierarchy
D. Use Backgrounds to Reduce Noise
Before focusing, look behind the plant.
l Bright leaf behind it? Move left.
l Branch cutting through the subject? Wait or change angle.
l Bright “holes” in the background? Adjust position or exposure.
The background doesn’t need to be perfect. But every element should be less interesting than the subject. If your eye keeps drifting to something behind the plant, that’s the real problem.
VIII. The Real Role of Gear
I’m not going to say gear doesn’t matter. That would be false. Good gear lowers difficulty and raises the ceiling. A sharp, well-corrected macro lens does make clean files easier to work with.
But gear cannot solve:
l Composition logic — no lens tells you where to place the subject
l Light structure — no camera creates missing shadows
l Attention design — no pixel count decides what the viewer sees first
Think of gear as a ladder. It helps you climb higher. But you still decide where to look.
I’ve taken great plant photos with a $100 used DSLR, a reversed kit lens, and natural window light. I’ve also seen technically perfect but emotionally empty images shot with expensive systems.
The decision is always yours. Not the gear.
IX. What Actually Helps
If you do want to invest in tools, prioritize those that increase control, not just sharpness.
l A 90mm–100mm macro lens — not for sharpness, but working distance. More distance = more control over light and background
l A small LED light with diffuser — lets you see shadow changes in real time before shooting
l A stable tripod with a reversible center column — for precise framing (at macro distances, 2mm matters)
l A portable diffuser or white curtain — softening harsh sunlight costs almost nothing but dramatically improves dimensionality
Notice what is not on the list: the sharpest lens, the highest megapixel body, the newest sensor. Those are nice—but not solutions to boring plant photos.
X. Conclusion: The Real Upgrade Is Not Gear—It’s Vision
Sharpness only makes what you’ve already decided to show more visible. It cannot make that decision for you.
The shift from “recording” to “creating” happens in your mind, not your shopping cart.
Before checking focus or obsessing over sharpness, ask yourself:
1. What is this photo actually about? (Answer in one sentence)
2. Where should the eye go first, second, and last?
3. What in the frame contributes nothing—and can I remove it?
Answer these honestly, and you won’t need sharper gear. You just need to keep shooting.
Because the most boring plant photo is not the one that isn’t sharp enough.
It’s the one that is extremely sharp, extremely flat, and extremely forgettable.
FAQs
1. Why do my macro photos look like scientific documentation instead of art?
Because they often prioritize detail over visual hierarchy, light shaping, and emotional context.
2. Can I achieve professional-looking plant photos without expensive gear?
Yes. Control of light, composition, and background has a far greater impact than camera price.
3. What is the biggest mistake beginners make in macro photography?
Trying to keep everything in focus instead of guiding the viewer’s attention.
4. How can I improve lighting without studio equipment?
Use natural light: shoot during overcast conditions, position subjects near windows, or use simple diffusers like curtains or paper.
5. Why does my background look distracting even when blurred?
Because brightness, contrast, and shapes still attract attention—even when out of focus.
6. Should I always isolate the subject with a blurred background?
Not always. A clean, structured background can add context, but it must remain visually subordinate to the subject.
References
1. Freeman, M. (2020). The Photographer’s Eye: Composition and Design for Better Digital Photos (2nd ed.). Routledge.
2. Peterson, B. (2021). Understanding Exposure (4th ed.). Amphoto Books.
3. Hunter, F., Biver, S., & Fuqua, P. (2022). Light: Science & Magic: An Introduction to Photographic Lighting (5th ed.). Routledge.
4. Kelby, S. (2023). The Digital Photography Book (Vol. 1–5 updated editions). Rocky Nook.
5. Cambridge in Colour. (2024). Understanding Depth of Field. Retrieved from [https://www.cambridgeincolour.com]
6. National Geographic. (2022). Tips for Macro and Nature Photography. Retrieved from [https://www.nationalgeographic.com]
About the Author
Lucas Bennett
Focus: Real-World Shooting Limitations, Perception vs Gear
Lucas Bennett writes about the gap between camera performance and real-world results. His work focuses on the hidden limitations of autofocus systems, zoom lenses, and high-end gear—revealing why better equipment doesn’t always lead to better photos.
Editorial Transparency Statement
This article is based on the author’s personal experience in macro and plant photography, combined with established principles of visual design, composition, and lighting.
No sponsorships, affiliate influences, or brand partnerships affected the content of this article. Any tools or equipment mentioned are included solely for educational purposes and reflect practical usage rather than commercial promotion.
Disclaimer
The information provided in this article is for educational and informational purposes only. Results in photography may vary depending on individual skill level, shooting conditions, and equipment used.
While every effort has been made to ensure accuracy, the author and publisher make no guarantees regarding specific outcomes. Readers are encouraged to experiment and adapt techniques to their own creative workflow.
Recommend:

You Tried Shooting Product Photos at Home—But They Look Cheap

How to Build a Travel Camera Kit You’ll Actually Use (Not Just Carry Around)

The Hidden Legal Risks of Uploading Photos to Stock photography platforms

Family Photography Without the Fake: A Simple Setup for Capturing Real Life